Bonded Nose Gear Strut, Installed Oil and Fuel Pressure Manifold – 4.5 hrs
Saturday Dec 15, 2012
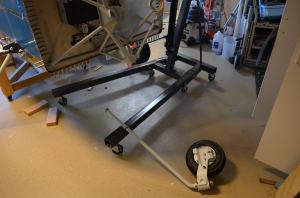
I have read reports on the forums that some RV owners have had problems with the nose gear bolt loosening over time and/or the bolt hole yielding allowing the nose gear to rotate slightly around the strut axis. Some builders have opted to put a large tapered pin in place of the 5/16 bolt requiring the holes to be reamed together at assembly. There are a lot of RVs flying without this problem apparently so I decided to stay with the Vans standard design. There is another way to strengthen the joint and that is to epoxy bond the mating surfaces between the strut and the engine mount around the bolt hole. I decided to go this route. The first step was to remove the nose gear strut from the engine mount.
I bought some Devcon epoxy mix at the hardware store. I chose this epoxy because it is strong (2500 psi) and it is rated for use up to 200 F. That relatively low temperature means I can easily heat the strut up and weaken the bond if I every need to remove the strut again. Other epoxies rated up to 500 F would make that very difficult. I am thinking at the gear bolt should stay well below 200 F in service.

I cleaned the journal surfaces of the strut and the mount with solvent to remove any grease. Then mixed the epoxy and rubbed a generous layer on the inside diameter of the mount. Then I inserted the gear strut half way. I applied a thin layer of grease to the lower strut journal which will not be bonded, then pushed the strut all the way in. A good bit of epoxy oozed out so I am confident I got an adequate amount in the joint. Then I just inserted the bolt and torqued up the nut. I cleaned up the excess epoxy. Here is the bolted joint starting to cure. I can’t get the bolt in from the inside of the cockpit as prescribed in the plans because the hole is slightly too high. I don’t know how that happened because I think I measured it accurately. I may be in the tolerances of the engine mount or perhaps I should have used a 1-inch hole (the plans call for a 3/4 inch hole). So I inserted the bolt with the head up. I have read that others have done this also. I may have to punch a dimple in the hole plug to clear the nut head.

I also assembled the manifold for the oil and fuel pressure sensors. First I had to rivet the F-745 ribs to the firewall. Then I installed the fittings and hole plugs on the manifold using Permatex #2 to seal the threads. I was worried that the fittings may not want to point in the right direction when I tightened them up but they came out fine. Maybe I was just lucky. If so, I’ll take it. Then I mounted the manifold to the firewall using two AN3 bolts. Finally, I installed the oil pressure hose from the kit with two Adel clamps to secure it along the top of the firewall recess.


A really nice example of an RV7A by Byron Graves. I hope mine looks half this good

Build Phase
